
Elixir Scramble: 30-Minute Battle Plan
Rules, every building’s points and effects, the phase timers, personal scoring, and a step-by-step plan for winning the 30-minute alliance battle.
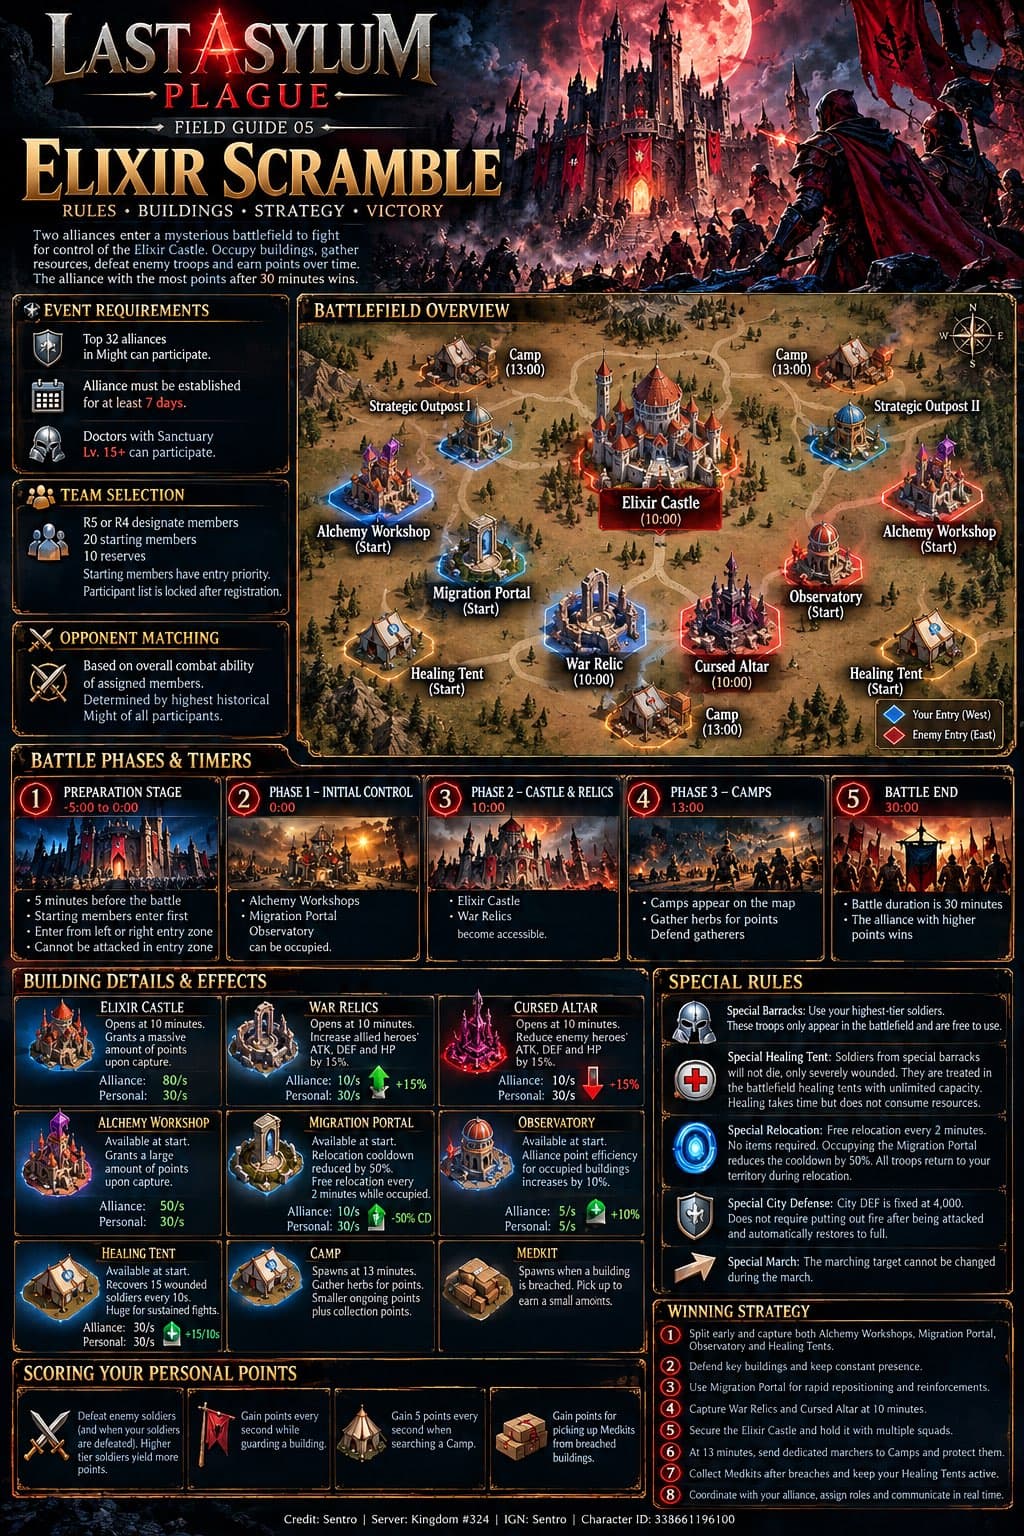
What Elixir Scramble is#
Two alliances enter a battlefield to fight for control of the Elixir Castle. You score by occupying buildings, gathering resources at Camps, defeating enemy troops, and collecting Medkits. Points tick up over time for every building you hold. The alliance with the most points after 30 minutes wins.
The key idea: this is a points race, not a kill race. An alliance that holds the right buildings for the whole match can win even if it loses more fights.
Who can join#
Alliance requirements:
- Top 32 alliances in Might (measured at Monday 00:00).
- Alliance established for at least 7 days.
- Individual Doctors need Sanctuary Lv.15+.
Team selection:
- R5 or R4 designates members: 20 starters and 10 reserves.
- Starting members have entry priority.
- The participant list locks after registration — pick carefully.
Opponent matching is based on the overall combat ability of the assigned members, determined by the highest historical Might of all participants.
The battlefield#
Your alliance enters from the west (blue); the enemy enters from the east (red). Each side has its own Alchemy Workshop, Healing Tent, and nearby buildings; the Elixir Castle sits in the middle, with War Relics and the Cursed Altar below it. Strategic Outposts sit to either side of the Castle, and Camps appear around the edges later in the match.
Phases and timers#
| Time | Phase | What happens |
|---|---|---|
| −5:00 to 0:00 | Preparation | Starters enter first, from the left or right entry zone. You can’t be attacked in the entry zone. |
| 0:00 | Phase 1 — Initial Control | Alchemy Workshops, Migration Portal, Observatory, and Healing Tents can be occupied. |
| 10:00 | Phase 2 — Castle & Relics | Elixir Castle, War Relics, and Cursed Altar become accessible. |
| 13:00 | Phase 3 — Camps | Camps appear. Gather herbs for points and defend your gatherers. |
| 30:00 | Battle End | Higher points wins. |
Buildings: points and effects#
Each building pays alliance points per second to your total and personal points per second to whoever is guarding it.
| Building | Opens | Alliance pts/sec | Personal pts/sec | Effect |
|---|---|---|---|---|
| Elixir Castle | 10:00 | 80 | 30 | Massive point bonus on capture. |
| Alchemy Workshop (×2) | Start | 50 each | 30 | Large point bonus on capture. |
| Healing Tent (×2) | Start | 30 each | 30 | Recovers 15 wounded soldiers every 10 sec — huge in sustained fights. |
| War Relics | 10:00 | 10 | 30 | +15% allied heroes’ ATK, DEF, and HP. |
| Cursed Altar | 10:00 | 10 | 30 | −15% enemy heroes’ ATK, DEF, and HP. |
| Migration Portal | Start | 10 | 30 | Relocation cooldown −50%. |
| Observatory | Start | 5 | 5 | +10% alliance point efficiency for occupied buildings. |
| Camp | 13:00 | 5 | — | Gather herbs for points; smaller ongoing points plus collection points. |
| Medkit | On breach | — | Small | Spawns when a building is breached; pick up for points. |
Doing the math#
- Both Workshops together = 100 alliance pts/sec, more than the Castle’s 80. Over the first 10 minutes alone, holding both Workshops is worth 60,000 points before the Castle even opens.
- Both Healing Tents = 60 pts/sec and they heal your troops — they pay twice.
- War Relics and the Cursed Altar are only 10 pts/sec each, but together they swing hero stats by roughly 30% in your favor in every fight around the Castle.
Personal points#
Your personal score comes from:
- Defeating enemy soldiers (and when your soldiers are defeated). Higher-tier soldiers give more points.
- Guarding a building — points every second.
- Searching a Camp — 5 points every second.
- Picking up Medkits from breached buildings.
Special rules#
- Special Barracks: you fight with free troops at your highest trainable tier. They exist only on the battlefield — your real army isn’t used.
- Special Healing Tent: these soldiers cannot die, only become severely wounded. They’re treated in a battlefield tent with unlimited capacity. Healing takes time but costs no resources.
- Special Relocation: free relocation every 2 minutes, no items needed. Holding the Migration Portal halves the cooldown. All your troops return to your territory when you relocate.
- Special City Defense: city DEF is fixed at 4,000. You don’t need to put out fires after being attacked; it restores to full automatically.
- Special March: a march’s target cannot be changed once it’s moving. Pick targets carefully.
Because troops can’t die and healing is free, there’s no reason to hold back. Deploy aggressively — the only cost is the time your troops spend healing.
The 30-minute plan#
Before the match (−5:00)#
Assign roles so nobody is guessing:
- Workshop holders for both Alchemy Workshops.
- A castle strike team of your strongest squads.
- Tent defenders for the Healing Tents.
- Scouts to watch enemy movement and collect Medkits.
Enter your protected zone during prep (blue = allies, red = enemy).
0:00–10:00 — score early#
Split immediately and capture both Alchemy Workshops, the Migration Portal, the Observatory, and both Healing Tents. Keep a constant presence on each. Every second you hold them is points the enemy isn’t getting.
10:00 — Castle opens#
Send the strike team to capture War Relics and the Cursed Altar — they buff your heroes and weaken theirs for the Castle fight. Then secure the Elixir Castle and hold it with multiple squads. Use the Migration Portal’s faster relocation to reposition and reinforce quickly.
13:00–30:00 — hold and adapt#
Camps appear. Send dedicated marchers to the Camps and protect them, but don’t strip defenders from key buildings to do it. Whenever a building changes hands, Medkits scatter — send scouts to collect them. Keep your Healing Tents active so wounded troops get back into the fight.
Winning strategy summary#
- Split early and capture both Alchemy Workshops, the Migration Portal, the Observatory, and the Healing Tents.
- Defend key buildings and keep constant presence.
- Use the Migration Portal for rapid repositioning and reinforcements.
- Capture War Relics and the Cursed Altar at 10 minutes.
- Secure the Elixir Castle and hold it with multiple squads.
- At 13 minutes, send dedicated marchers to Camps and protect them.
- Collect Medkits after breaches and keep your Healing Tents active.
- Coordinate with your alliance, assign roles, and communicate in real time.
Comments
Loading comments…